 Pin it
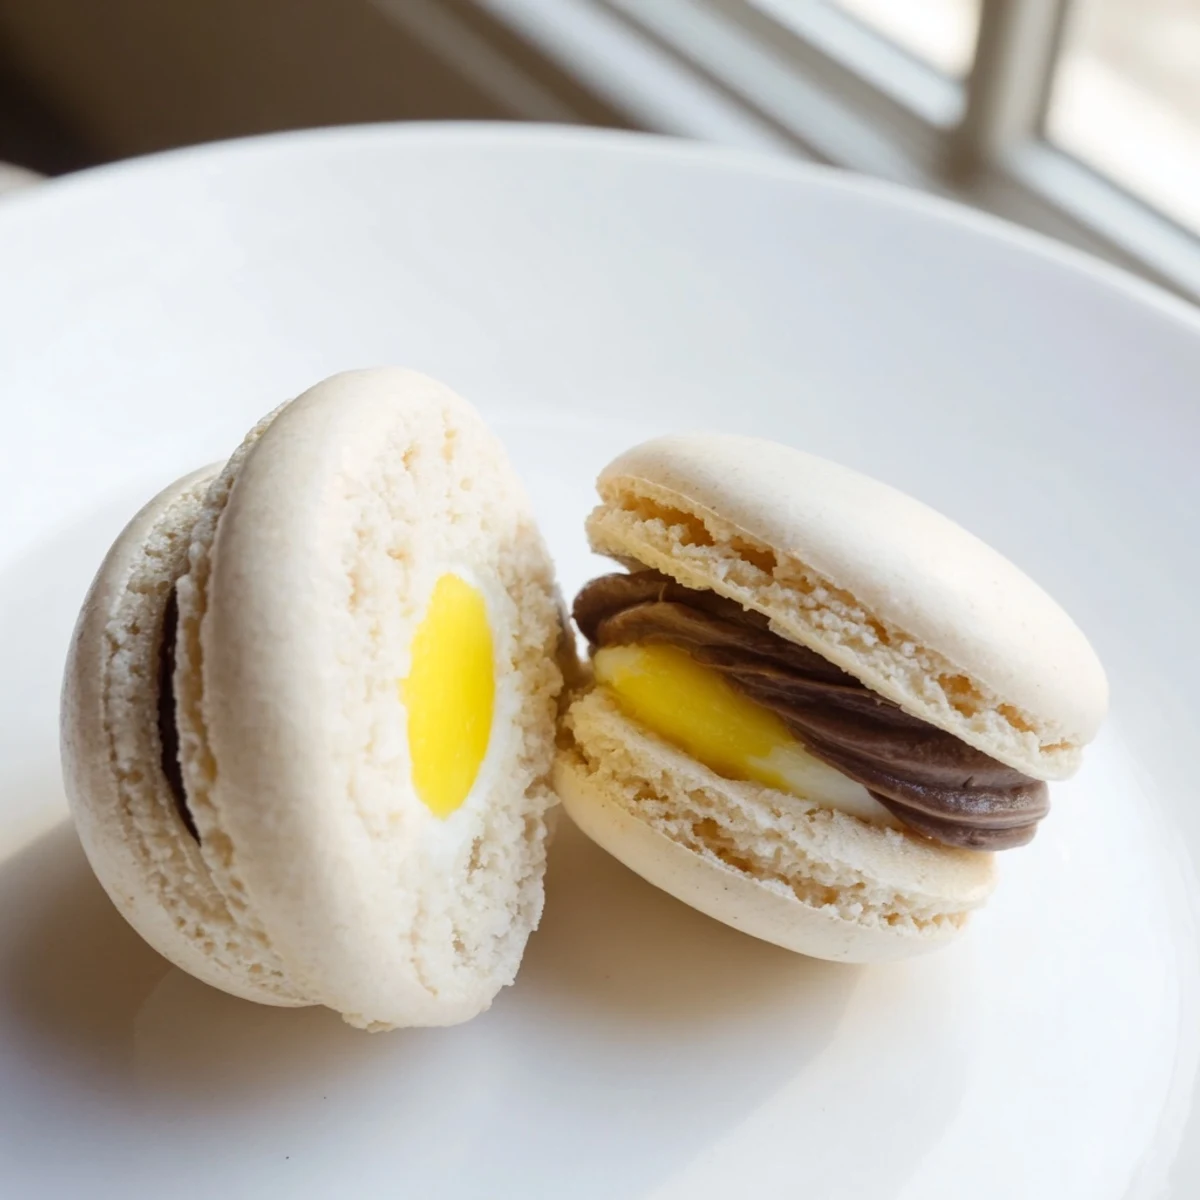
 These elegant French confections combine delicate almond meringue shells with a rich chocolate ganache filling that mimics the iconic Cadbury Creme Egg. The process involves creating the classic macaron shells using almond flour, egg whites, and sugar, then preparing a two-toned filling—white chocolate ganache piped in a ring with a golden yellow center to recreate that beloved egg yolk effect.
While these require some technique and patience, the stunning results are worth the effort. The shells develop their characteristic smooth tops and ruffled feet after proper resting and baking. Once assembled, these treats benefit from resting overnight, allowing the flavors to mature and the textures to achieve that perfect chewy yet tender consistency.
The kitchen counter was dusted with powdered snow, my apron speckled with yellow food coloring. Id been attempting macarons for months, but these were special—tiny pastel jewels modeled after those Cadbury eggs that appeared in Easter baskets every childhood spring. The first tray came out with sad little feet that looked more like stubby toes than the delicate ruffles Id seen in French patisseries.
Last Easter, my sister-in-law took one bite and actually gasped. She said it tasted like someone took the inside of a Cadbury egg and gave it a French passport. Those moments in the kitchen when something works—when the shells have proper feet and the filling doesnt explode out the sides—make every failed batch worth it.
Ingredients
- Almond flour and powdered sugar: Sifting these together three times makes all the difference between smooth shells and grainy disappointments
- Egg whites at room temperature: Cold whites refuse to whip into the stiff peaks you need for that signature macaron lift
- Granulated sugar and cream of tartar: The acid stabilizes your meringue so it holds its shape through folding and piping
- Food coloring: Gel colors work best—liquid throws off the delicate moisture balance in the batter
- Cadbury Dairy Milk: Using the actual Cadbury chocolate makes the filling taste authentically nostalgic, not just generically chocolate
- Golden syrup: This creates that gooey, honey-like texture that mimics the original creme egg center perfectly
Instructions
- Prepare your workspace:
- Line two baking sheets with silicone mats or parchment paper and fit a pastry bag with a half-inch round tip. Having everything ready before you start whipping whites saves so much panic later.
- Sift the dry ingredients:
- Combine the almond flour and powdered sugar in a bowl, then sift them together at least twice. Any lumps will show up as ugly bumps on your finished shells.
- Whip the meringue:
- In a completely clean and dry bowl, beat the egg whites with cream of tartar until soft peaks form. Gradually add the granulated sugar while continuing to whip until you have stiff, glossy peaks that stand straight up when you lift the whisk.
- Master the macaronage:
- Gently fold the almond flour mixture into the meringue in three additions, using a spatula to scrape around the edges and through the middle. The batter is ready when it flows slowly off your spatula in thick ribbons and disappears back into itself within 30 seconds.
- Pipe perfect rounds:
- Transfer the batter to your pastry bag and pipe 32 small circles, about one and a half inches across, onto your prepared sheets. Hold the bag perpendicular to the tray and apply even pressure, then stop squeezing and quickly lift straight up.
- Rest the shells:
- Firmly tap each tray against the counter several times to release trapped air bubbles. Let the shells sit at room temperature for 30 to 60 minutes until the surface looks dull and feels dry to your fingertip—this skin is what creates the feet during baking.
- Bake to perfection:
- Preheat your oven to 300°F and bake the macarons for 13 to 15 minutes, rotating the trays halfway through. Theyre done when the shells easily lift off the mat without sticking, and you can see those lovely little feet at the base.
- Make the filling:
- Heat the cream until it just starts to simmer, then pour it over the chopped milk chocolate and let it sit for two minutes. Stir until completely smooth, then add the golden syrup and softened butter, mixing until glossy and thick.
- Create the yolk effect:
- Scoop out about a quarter of the chocolate filling and tint it with yellow gel coloring. Chill both fillings until theyre thick enough to pipe but still spreadable—about 30 minutes in the refrigerator.
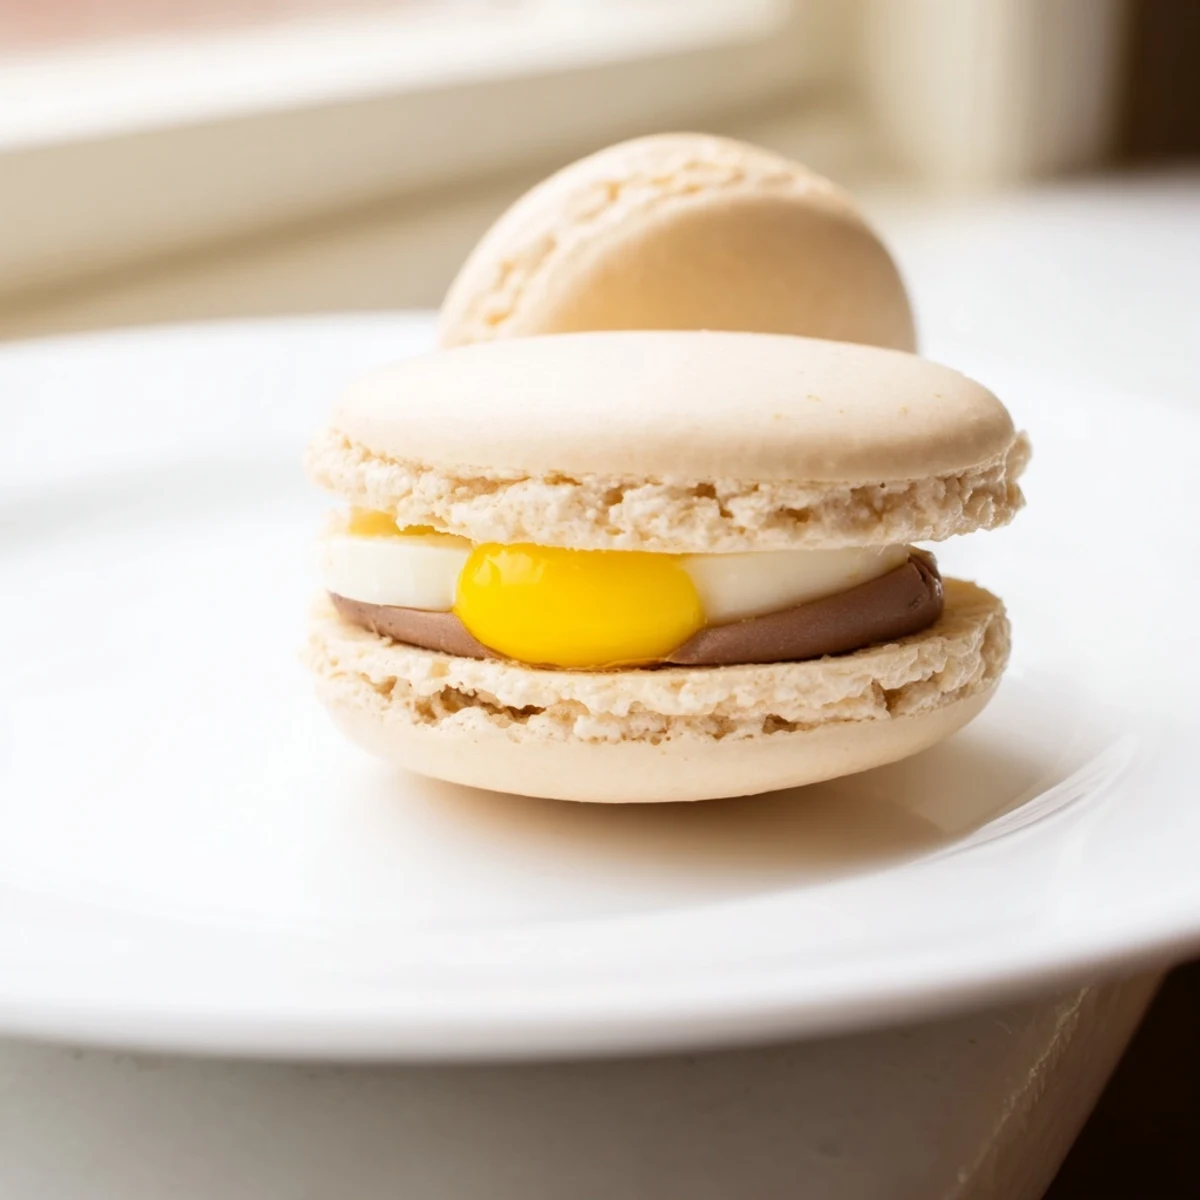
- Assemble with care:
- Pipe a ring of chocolate filling onto one shell, then place a small dollop of yellow filling right in the center like a yolk. Gently press another shell on top until the filling reaches the edges, taking care not to crack the delicate shells.
 Pin it
 Those first successful batches felt like winning a medal. Now theyre the thing everyone requests for spring gatherings, the first treat to disappear from the dessert table. Something about biting through that crisp shell into creamy chocolate and sweet yellow center just makes people happy.
Getting That Perfect Foot
The secret is in the rest period—skipping it means no feet and flat, disappointing cookies. I learned this the hard way after three failed batches, standing in front of the oven watching shells that refused to rise. Now I use that resting time to clean up and prep my filling ingredients, turning impatience into productivity.
Color Play
While the yellow yolk effect is classic, pastel shells in pink, mint green, and lavender make these feel even more festive. Just remember that gel food coloring is potent—start with a tiny amount on the end of a toothpick. You can always add more, but you cant take it back once its too dark.
The Waiting Game
These need to mature in the fridge for at least 24 hours before serving, which might be the hardest part of the whole recipe. During that rest time, the shells soften slightly and meld with the filling, creating that perfect chewy texture macarons are famous for. Plan to make them a day ahead of your gathering.
- Bring them to room temperature 30 minutes before serving for the best texture
- Store them in a single layer to prevent the delicate shells from cracking
- They actually improve over three days, if you can keep them around that long
 Pin it
 These little confections have become my signature spring treat, the ones that make people ask, Did you really make these? Thats the best compliment of all.
Recipe Questions & Answers
- → Why do my macaron shells crack during baking?
-
Cracking typically occurs when shells haven't rested long enough to form a dry skin, or if there's excess air in the batter. Let piped shells rest 30–60 minutes until they're dry to touch, and tap trays firmly after piping to release trapped air bubbles.
- → Can I make the filling in advance?
-
Absolutely. The chocolate ganache filling can be prepared up to one day ahead and stored refrigerated. Bring to room temperature and briefly whip before piping for the best consistency.
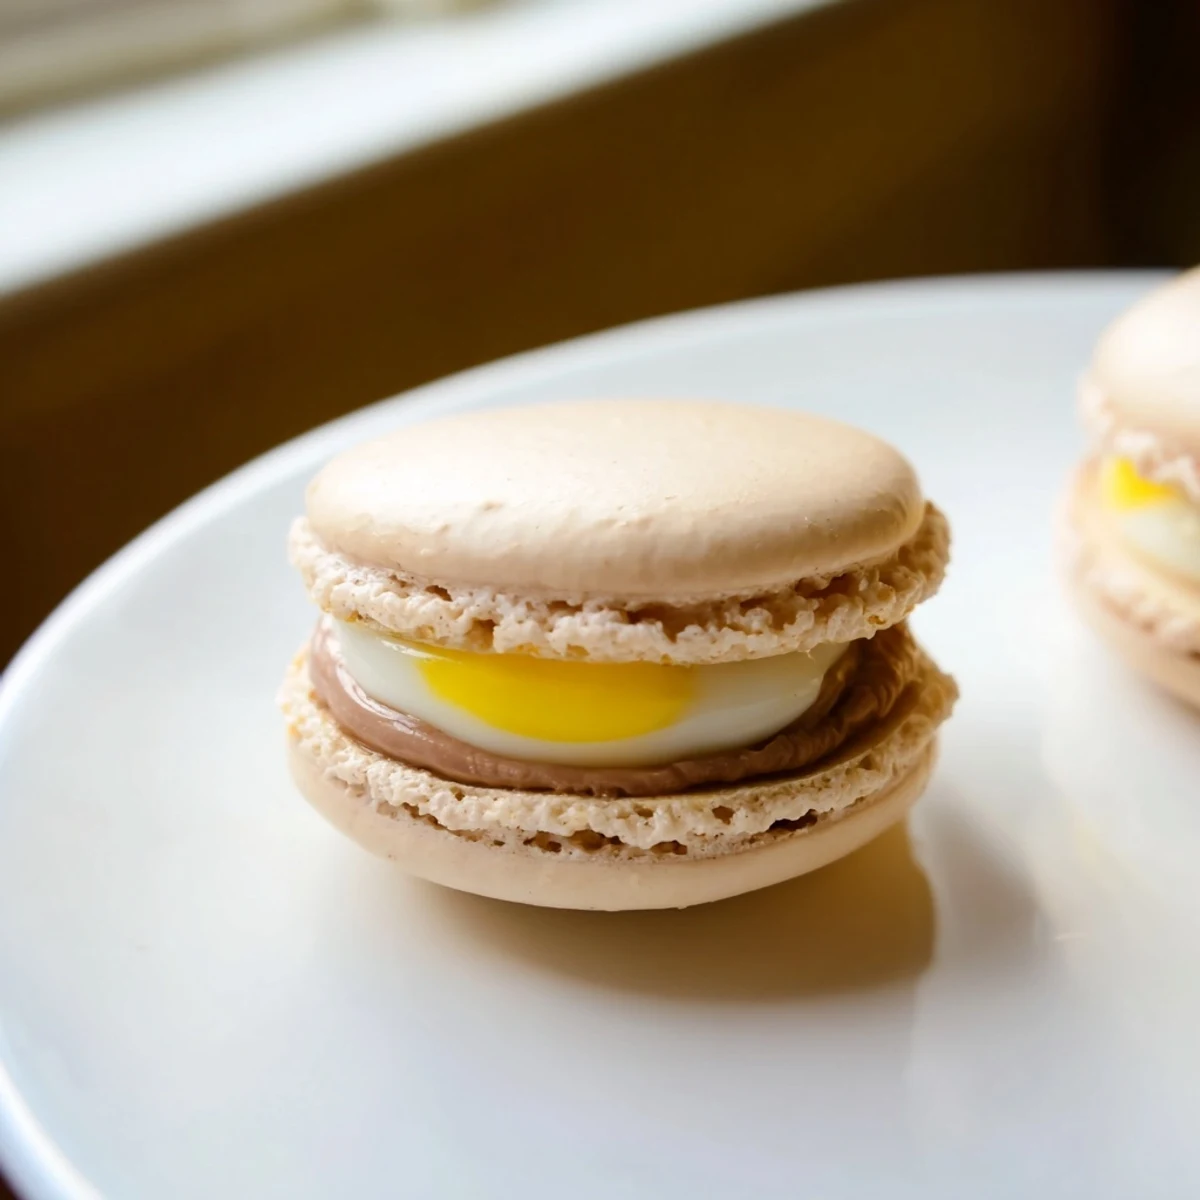
- → What's the best way to achieve the yolk effect?
-
Reserve about one-quarter of your filling and tint it with yellow gel coloring. Pipe a ring of white chocolate ganache first, then add a small dollop of yellow filling in the center before sandwiching with the top shell.
- → How should I store these macarons?
-
Store assembled macarons in an airtight container in the refrigerator for up to 5 days. They actually improve after resting overnight as the filling softens the shells slightly and flavors meld together.
- → Can I use a different chocolate for the filling?
-
While Cadbury Dairy Milk provides the most authentic flavor, any quality milk chocolate will work beautifully. Dark chocolate lovers can substitute for a richer, less sweet version of these elegant treats.
- → Why is my batter too thick or too runny?
-
The perfect macaronage stage is when batter flows in thick ribbons and disappears within 30 seconds. Over-mixing makes batter runny; under-mixing keeps it too stiff. Practice makes perfect with this technique.