 Pin it
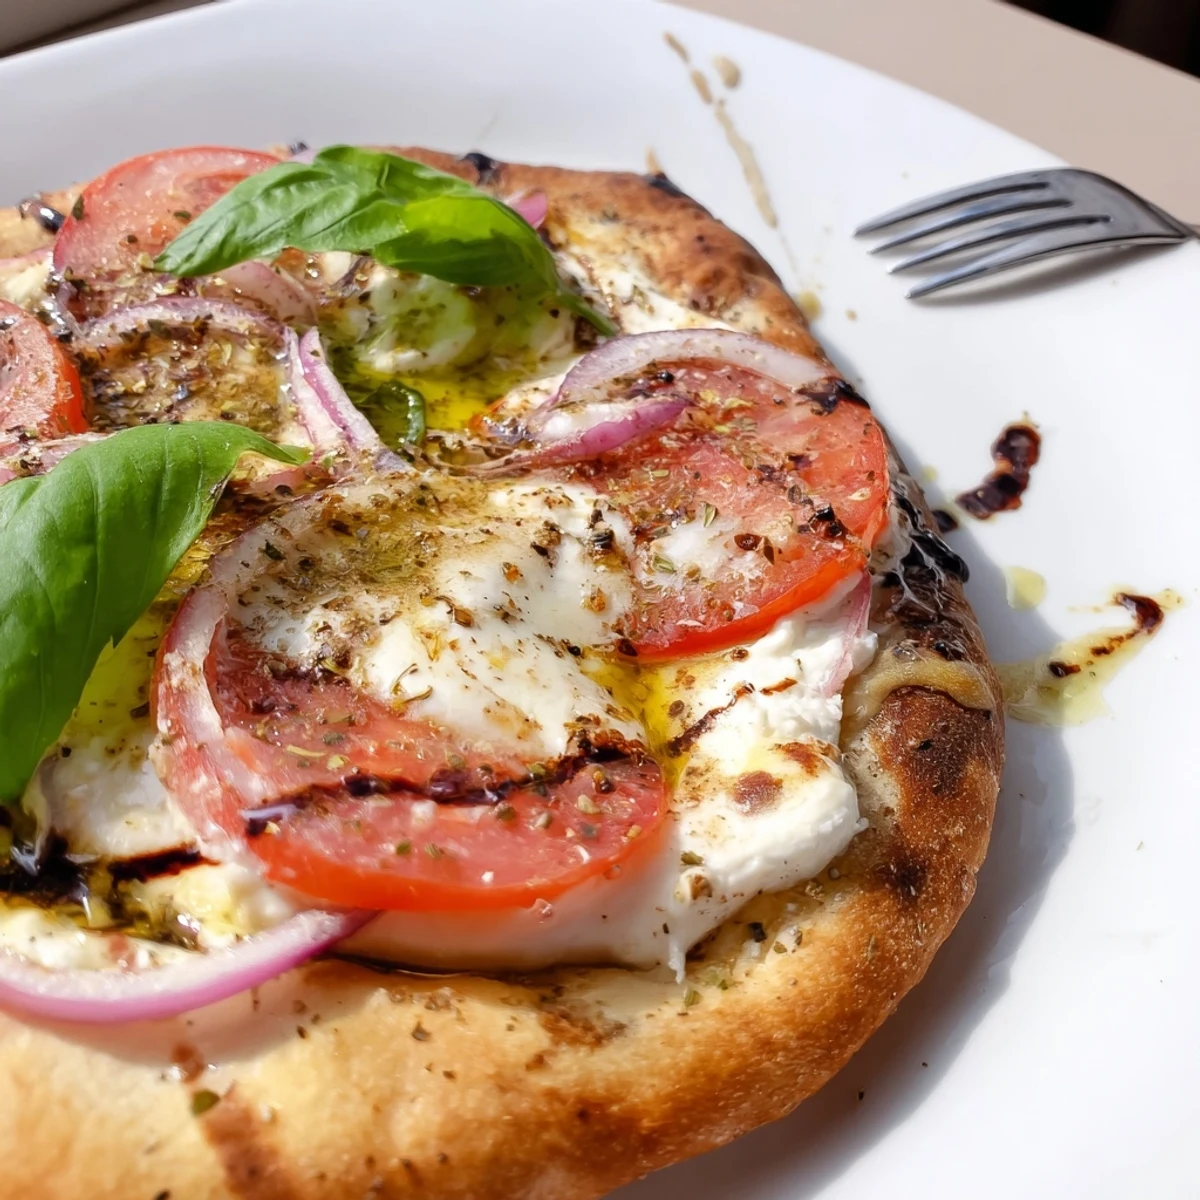
 These quick pita pizzas layer a silky whipped garlic feta over warm pita rounds, then top with sliced mozzarella and ripe tomatoes before baking until edges are golden and cheese is melty. Finished with torn basil and a balsamic drizzle, they offer bright, creamy contrasts and crisp edges.
Ready in about 30 minutes, they suit busy weeknights and adapt easily to gluten-free pitas, cherry tomatoes for extra sweetness, or a handful of arugula added after baking.
The first time I made these Caprese Pita Pizzas, it wasn’t part of any grand plan—just a craving for something lively and quick after a long summer walk. As I whipped the feta, the kitchen filled with the bright scent of lemon and garlic, reminding me how much I love recipes that come together with simple steps and bold flavors. The pitas crisp in the oven and the mozzarella turns irresistibly gooey, creating an inviting contrast with the cool, velvety whipped feta spread underneath. By the time I scattered basil leaves over top, the whole place smelled like a tiny Mediterranean café.
I once made a batch of these for a movie night, layering tomatoes while my sister balanced bowls of popcorn on her lap nearby. She declared them 'dangerously good,' and we ended up making another round halfway through the film because not a crumb was left. That spontaneous repeat confirmed these little pizzas have a magnetic pull on any gathering—no matter how informal. Even the ones who insisted they were full kept wandering back for just one more slice.
Ingredients
- Feta cheese: Stick to block feta for extra creaminess; I’ve learned that the pre-crumbled stuff doesn’t blend as silkily.
- Cream cheese: Softened cream cheese helps the spread stay fluffy and spreadable, so let it sit at room temp for a bit.
- Garlic: Freshly minced garlic delivers the punch—don’t go overboard though, since it’s raw and strong.
- Extra-virgin olive oil: This pulls the whipped feta together and adds a touch of lushness; use a peppery, good quality one if you can.
- Lemon juice: A secret splash that brightens the cheese and keeps the flavors lively.
- Black pepper: I like to grind it at the last second for maximum aroma—don’t skip this tiny finishing touch.
- Pita breads: Slightly thick pitas hold up best and get golden and crisp at the edges.
- Olive oil (for brushing): Gives the base a subtle crunch—spread it right to the crusts for full flavor.
- Fresh mozzarella: These rounds melt perfectly; slice them thin so they don’t slide off when you eat.
- Ripe tomatoes: The juicier and redder the better—let them drain a bit if you want your pizza less soggy.
- Red onion (optional): Adds a sweet, sharp bite if you’re in the mood for extra zing, but totally skippable.
- Fresh basil: Always tear your basil right before serving for that fragrant green burst.
- Salt and black pepper: Keep it light—both feta and mozzarella are salty already, so taste as you go.
- Balsamic glaze (optional): Brings a sweet finish and a pretty shine with just a thin drizzle.
Instructions
- Get the oven and pans ready:
- Heat your oven to 220°C (425°F) and line a baking sheet with parchment paper—the crinkly sound always feels promising at the start.
- Make the whipped garlic feta:
- Toss feta, cream cheese, garlic, olive oil, lemon juice, and a few twists of black pepper into a food processor. Blend until creamy, stopping to scrape the bowl so every bit gets perfectly smooth.
- Set up the pita bases:
- Lay pitas on your prepped tray and brush them with olive oil right to the edges for maximum crunch.
- Spread the flavorful base:
- Working with a spoon or spatula, spread a generous layer of whipped feta across each pita, resisting the urge to lick your fingers just yet.
- Layer the toppings:
- Arrange mozzarella and tomatoes over the feta, with a few thin slices of red onion if you're adding those; sprinkle salt and black pepper lightly on top.
- Bake the pizzas:
- Slide the sheet into the oven for 8–10 minutes, watching for the cheese to bubble and the pita edges to turn golden brown.
- Add finishing touches:
- Once out, let the pizzas rest for a minute, then shower on torn basil leaves and drizzle with balsamic glaze if you want a hint of sweetness.
- Serve and enjoy:
- Slice each pita into quarters and serve right away while everything is still warm and melty.
 Pin it
 I’ll never forget the evening these became a dinner-table centerpiece—not fancy, just laughter and hands reaching for slices before I’d even finished drizzling the glaze. The conversation almost paused, replaced by that collective sigh you only hear when food lands perfectly with everyone at once. It’s a dish that instantly feels like it’s been part of your rotation forever. A pizza, yes, but dressed up in its summer best.
Making the Whipped Garlic Feta Irresistible
I’ve found that pulsing the cheeses together in short bursts keeps the spread airy rather than dense. If your feta is on the dry side, add another drizzle of olive oil until it catches the blade and goes almost mousse-like. Don’t be afraid to scrape the sides down a couple times—those pockets of fluffy cheese are worth it. Taste once and adjust lemon; just a few drops can dramatically shift the flavor balance.
How to Get the Crispiest Pita Base
Letting the pita bake for a couple minutes on its own before topping is a game changer if you like a sturdy, crunchy bite. A little extra olive oil, brushed right out to the rim, means all-over golden edges that don’t go chewy after topping. If you’re using thicker pitas, keep an eye on the oven as they’ll crisp and puff differently than the thinner ones. Rotating the tray halfway through ensures that every personal-size pizza gets its fair share of heat.
Easy Ways to Switch Up Your Caprese Pita Pizza
No good pizza night should feel rigid, so sub in roasted red peppers or swap in arugula if you’re feeling peppery. Sometimes I sneak on a few olives or scatter chili flakes for a little heat, just to see who’s paying attention at the table. The balsamic is optional, but brings a glossy finish everyone notices.
- If making ahead, add basil and glaze after baking, never before.
- Leftovers reheat best in a skillet, just two minutes on low heat.
- Soggy pitas are never fun—drain your tomatoes if they’re extra juicy.
 Pin it
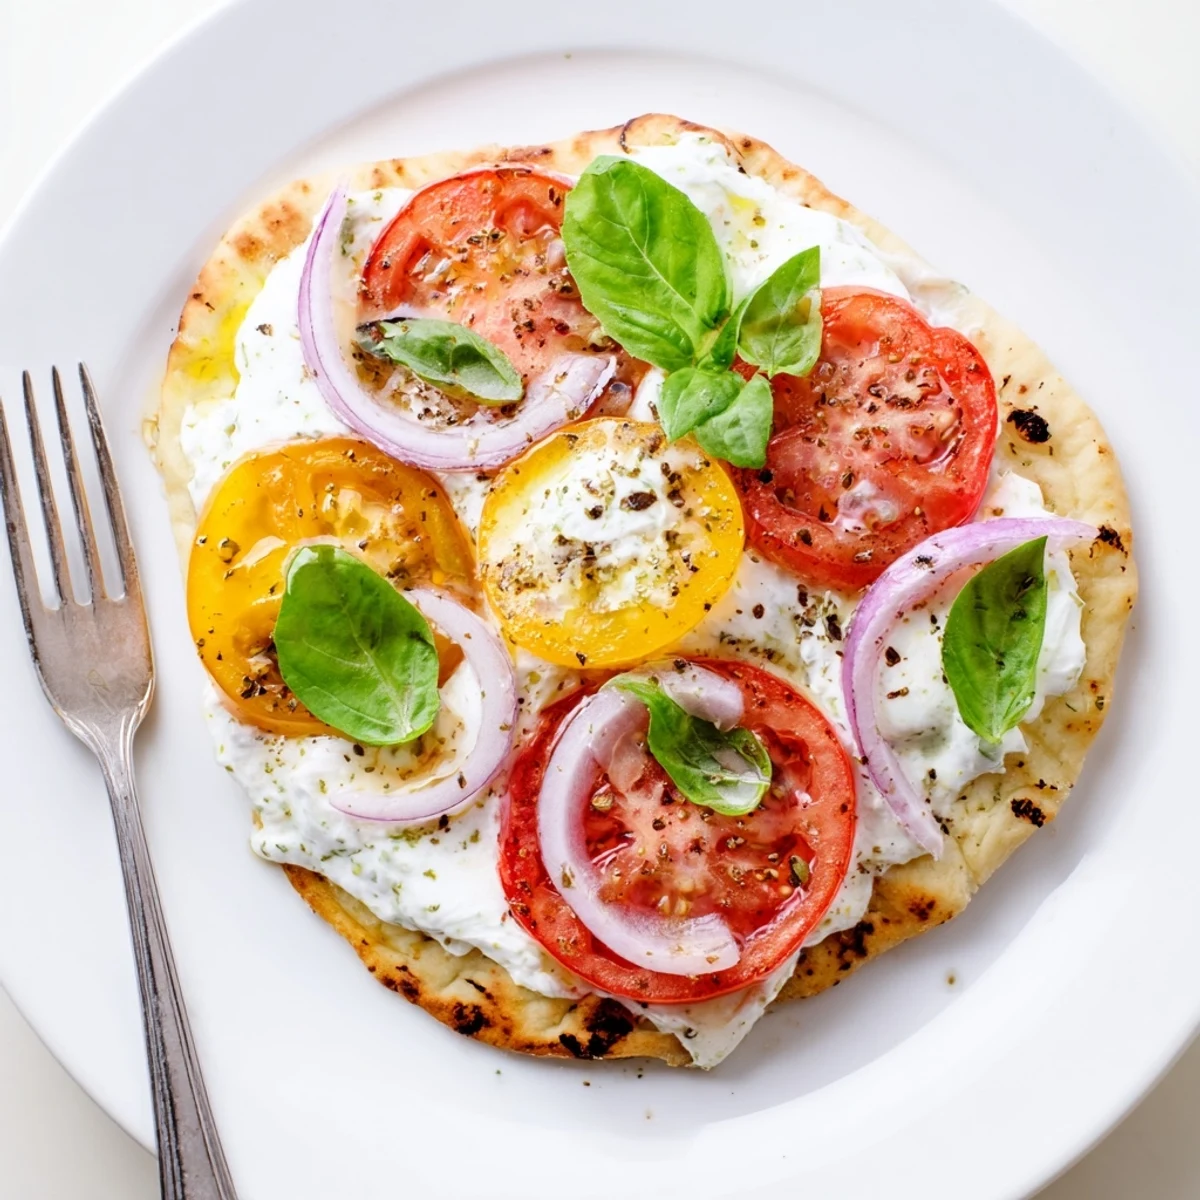
 Share these Caprese Pita Pizzas when you need something bright, easy, and a little luxurious without fuss. Sometimes, it’s the simplest combos that make you fall in love with your own cooking all over again.
Recipe Questions & Answers
- → How do I store leftovers?
-
Cool to room temperature, then refrigerate in an airtight container for up to 2 days. Reheat briefly in a low oven to restore crisp edges and melted cheese; avoid the microwave to prevent sogginess.
- → What’s the best way to reheat without soggy bread?
-
Reheat at 180°C (350°F) on a baking sheet for 6–8 minutes, or until edges crisp and cheese softens. A hot oven revives texture better than the microwave.
- → Can I make the whipped garlic feta ahead?
-
Yes—whip the feta up to 3 days in advance and keep refrigerated in a sealed jar. Bring it to room temperature and stir before spreading to soften the texture.
- → Any tips for whipping the feta smooth?
-
Use a food processor or sturdy blender and add olive oil and lemon gradually. Scrape the sides and blend until creamy; a touch more oil or a splash of water helps if it’s too thick.
- → Can I substitute ingredients for dietary needs?
-
Swap gluten-free pita or flatbreads for a gluten-free option, use dairy-free cheese alternatives to avoid dairy, or choose cherry tomatoes for a sweeter topping.
- → How do I get the best tomato and cheese balance?
-
Use ripe but firm tomatoes and thin slices so they release little liquid. Layer cheese first over the whipped feta to shield the bread, then top with tomatoes and a light seasoning for balance.