 Pin it
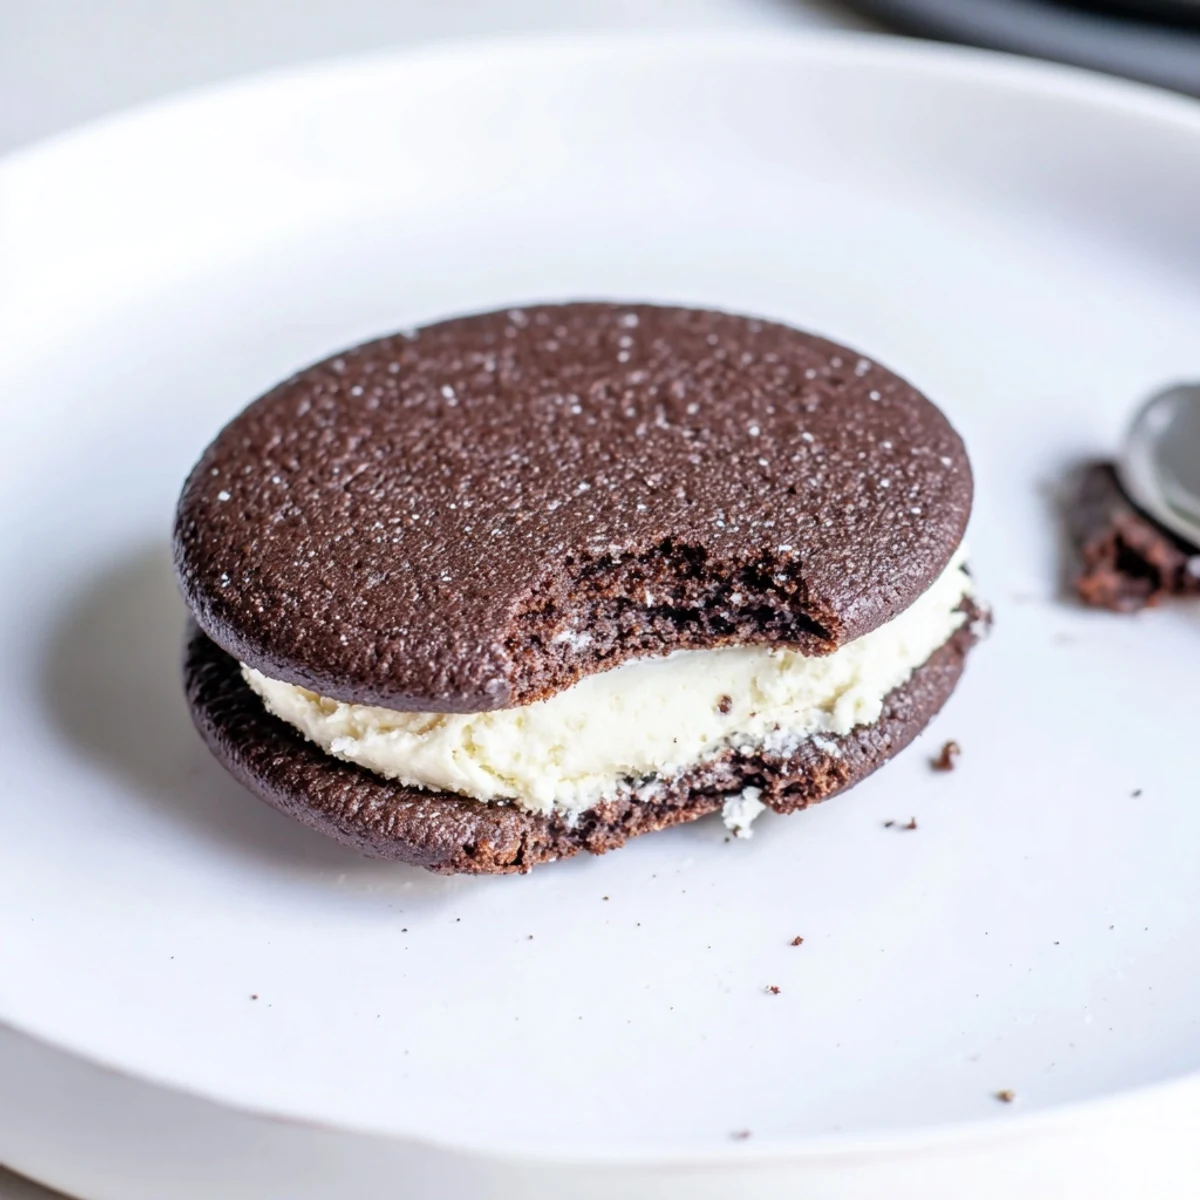
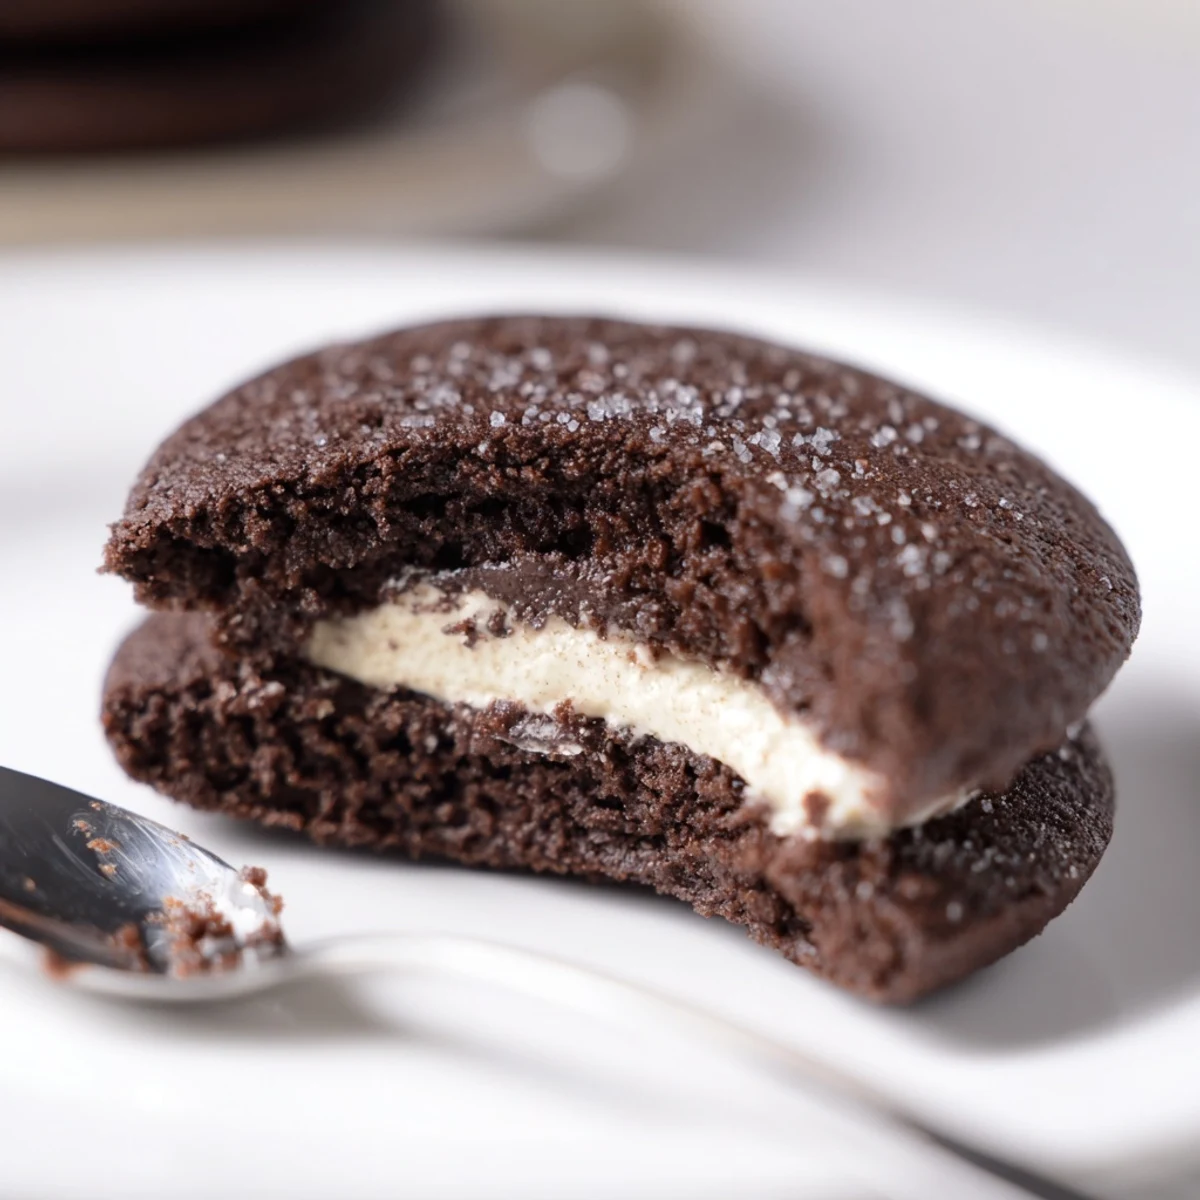
 Sift together flour, Dutch-process cocoa, baking soda and salt. Cream butter and sugar, add egg and vanilla, then incorporate the dry mix into a stiff dough. Roll into 1-inch balls, flatten and bake at 350°F for 10–12 minutes. Cool, prepare a vanilla buttercream with butter, shortening and powdered sugar, sandwich cookies and let set. Yields about 18; add espresso powder for deeper chocolate notes and store airtight up to 5 days.
The smell of dark cocoa and butter hitting a warm kitchen on a rainy Saturday afternoon is enough to make anyone believe in magic, and that is exactly what happened the weekend my niece challenged me to make homemade Oreos from scratch. She was unconvinced anything could rival the store bought twist and dunk ritual she had perfected by age six. Two hours later, covered in cocoa dust and powdered sugar, we both sat on the kitchen floor eating wobbly sandwich cookies straight off the rack, grinning like conspirators. Those imperfect, intensely chocolatey little discs ruined us for the packaged kind forever.
I brought a tin of these to a potluck last winter and watched a grown man quietly eat five of them standing by the dessert table, pretending he was inspecting the other options between each one. Nobody believed they were homemade until I showed them the cocoa smudges still staining my fingernails.
Ingredients
- All purpose flour (1 cup): Provides structure without making the cookies tough, and sifting it keeps the crumb tender.
- Dutch process cocoa powder (¾ cup): This is non negotiable for that deep, almost black color and mellow chocolate depth.
- Granulated sugar (1 cup): Sweetens and helps crisp the edges while keeping centers chewy.
- Baking soda (½ tsp): Gives just enough lift so the cookies are not hockey pucks.
- Salt (¼ tsp): A small amount that makes the chocolate taste exponentially more complex.
- Unsalted butter, softened (½ cup for cookies): Room temperature butter creams properly and incorporates air for better texture.
- Large egg (1): Binds the dough together and adds richness.
- Vanilla extract (1 tsp for dough): Rounds out the cocoa and makes the flavor feel complete.
- Unsalted butter, softened (¼ cup for filling): Adds buttery depth to the cream center.
- Vegetable shortening (¼ cup): This is the secret to that classic Oreo style snap in the filling.
- Powdered sugar, sifted (1½ cups): Creates a silky, pipeable cream that holds its shape between the cookies.
- Vanilla extract (1 tsp for filling): Double down on vanilla here for that familiar creamy flavor.
- Salt (pinch for filling): Keeps the filling from tasting like pure sugar and nothing else.
Instructions
- Preheat and prepare:
- Set your oven to 350°F and line two baking sheets with parchment paper so nothing sticks and cleanup is effortless.
- Whisk the dry:
- Sift the flour, cocoa powder, baking soda, and salt into a bowl and watch how dark and fragrant it already looks.
- Cream butter and sugar:
- Beat the softened butter and granulated sugar until the mixture turns pale and fluffy, then add the egg and vanilla, mixing until everything is smooth and glossy.
- Bring the dough together:
- Gradually fold the dry ingredients into the wet, and do not be alarmed when a stiff, almost crumbly dough forms, because that is exactly what you want.
- Shape the cookies:
- Roll tablespoon sized portions into balls, space them two inches apart, and flatten each one gently with the bottom of a glass or the palm of your hand.
- Bake and cool:
- Bake for 10 to 12 minutes until set and slightly firm to the touch, then let them rest on the sheet for five minutes before moving to a wire rack.
- Make the filling:
- Beat the butter, shortening, powdered sugar, vanilla, and salt together until the mixture turns cloud white and spreadably smooth.
- Assemble the sandwiches:
- Pipe or spoon about a tablespoon of filling onto the flat side of half the cookies, then gently press the remaining cookies on top until the cream reaches the edges.
- Let them set:
- Give the assembled cookies 10 to 15 minutes at room temperature so the filling firms up and holds everything together beautifully.
 Pin it
 There is something quietly powerful about handing someone a cookie they recognize instantly but have never tasted quite like this before. These little sandwiches carry that rare ability to make people pause mid conversation and close their eyes.
What to Watch For
Dutch process cocoa is darker and less acidic than natural cocoa, and swapping them carelessly changes both the taste and how the dough behaves. I learned this the hard way when a batch turned out reddish brown and oddly tangy, which is fine for some recipes but completely wrong here. Check the label carefully before you start because the wrong cocoa will still taste decent but will not look or feel like an Oreo.
Keeping Them Fresh
These cookies store beautifully in an airtight container at room temperature for up to five days, though in my experience they rarely survive past day two. The filling actually improves after a few hours as the flavors meld and the texture settles into something perfectly creamy. You can also freeze the assembled sandwiches for up to a month if you need to hide them from yourself.
Making Them Your Own
Once you have the base recipe down, the variations are honestly the best part of making these at home. A teaspoon of espresso powder in the dough deepens the chocolate without adding any coffee flavor, and swapping the shortening for all butter gives you a richer, softer filling that tastes more like frosting. My niece now requests a double stuffed version with twice the filling every single time she visits.
- Try rolling the edges of assembled cookies in mini chocolate chips or sprinkles for a birthday party twist.
- A drop of peppermint extract in the filling makes these instantly festive for winter holidays.
- Always taste a cookie before serving to guests so you know exactly what you are sharing.
 Pin it
 Homemade sandwich cookies are a small act of love that taste like childhood but feel entirely grown up. Make them once and you will never look at the store aisle the same way again.
Recipe Questions & Answers
- → How do I keep the cookies from spreading too much?
-
Chill the dough briefly before shaping and avoid over-creaming the butter and sugar. Rolling into uniform 1-inch balls and flattening gently helps maintain even shape during baking.
- → Can I use natural cocoa instead of Dutch-process?
-
Natural cocoa will work but the flavor and acidity differ; you may notice a brighter, slightly tangier chocolate. If using natural cocoa, omit any acidic adjustments—this dough relies on baking soda for lift.
- → What’s the best way to get a smooth vanilla filling?
-
Sift the powdered sugar before beating, and start by creaming softened butter and shortening until fluffy. Add sugar gradually and scrape the bowl to ensure a smooth, pipeable consistency.
- → How do I make the cookies richer without changing texture?
-
Swap some or all of the shortening in the filling for additional butter for a richer mouthfeel. For the dough, adding 1 tsp espresso powder enhances chocolate depth without altering texture.
- → How should I store assembled sandwiches?
-
Layer cookies in an airtight container separated by parchment to prevent sticking. Keep at room temperature for up to 5 days; refrigeration can firm the filling but may change texture.
- → Can I freeze the cookie components?
-
Freeze baked cookies flat in a single layer until solid, then stack with parchment between layers. Freeze filling separately in a sealed bag. Thaw at room temperature and assemble shortly before serving for best texture.