Pin it
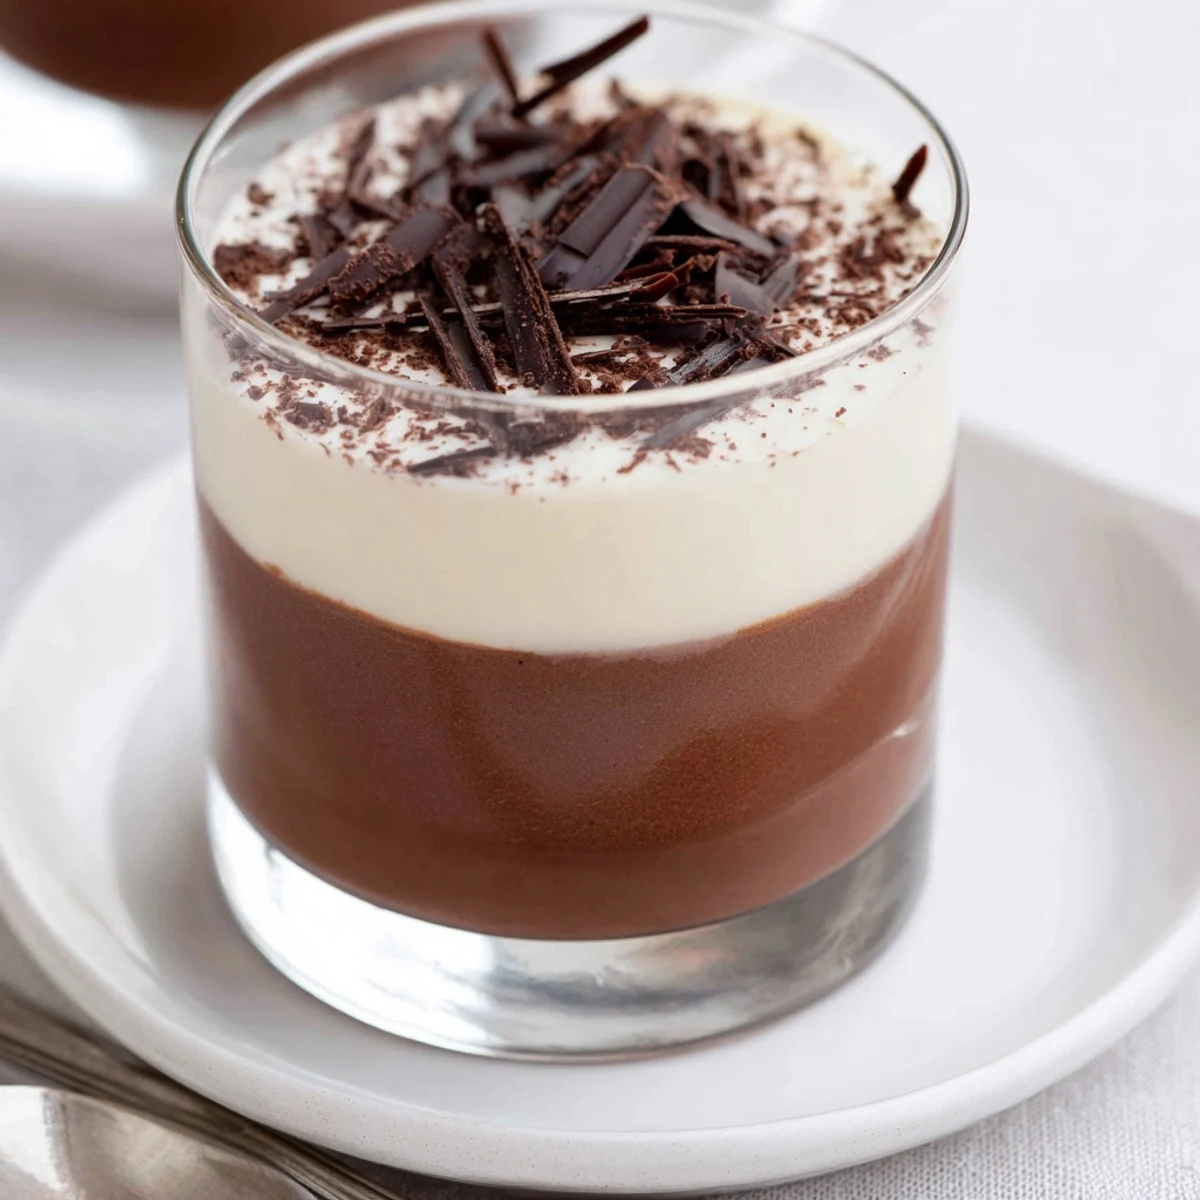
 Layer dark, milk and white chocolate mousses in six small cups for an elegant, chilled finish. Melt each chocolate, fold into whisked egg yolk and sugar, then incorporate softly whipped cream to preserve airiness. Chill between layers to prevent mixing, or quick-freeze briefly. Serve garnished with shaved chocolate or cocoa powder; add a splash of coffee liqueur to the dark layer for depth.
Sometimes, assembling these triple chocolate mousse cups makes me feel like a pastry chef on a mission—measuring, melting, and layering with the kind of anticipation that only chocolate lovers can know. I never planned to fall in love with the gentle swirl of whipped cream or the quiet suspense while layers set in the fridge, but the transformation from raw ingredients to elegant dessert always feels magical. The aroma of melted chocolate drifting through my kitchen signals both indulgence and a subtle kind of celebration. This recipe is equal parts showstopper and comfort food, dressed up in delicate cups.
One evening, my cousin challenged me to create a dessert worthy of our family’s picky eaters—rich enough for my uncle, classy enough for mom, and not too sweet for her finicky sisters. The process became a team effort, with laughter over spilled cream and enthusiastic debates about which chocolate deserved the top layer. When the mousse cups emerged from their final chill, all conversation paused for those first, silent bites—and the grin from my uncle said it all. That memory earned this dessert a top spot in my kitchen line-up.
Ingredients
- Dark chocolate (100 g, minimum 60% cocoa): This bold layer adds depth, so it’s worth splurging on high-quality chocolate; chop it finely to help it melt smoothly.
- Egg yolk (1 per layer): The yolks bring a luscious structure—separate them carefully so none of the white sneaks in.
- Sugar (1 ½ tbsp per layer): The sugar balances each chocolate’s natural bitterness or sweetness; I’ve learned to whisk it until barely grainy for the best texture.
- Heavy cream (100 ml per layer, cold): Cold cream whips best into soft peaks—don’t rush this part, as it brings lightness to each layer.
- Milk chocolate (100 g): Gentle and creamy, this chocolate wins over those who prefer things a little sweeter; chop it just like the dark chocolate.
- White chocolate (100 g): White chocolate is especially prone to seizing, so work gently over low heat and don’t panic if it thickens slightly.
- Shaved chocolate or cocoa powder (for garnish): These tiny touches elevate the final look—use a vegetable peeler for perfect chocolate curls.
Instructions
- Start the dark chocolate layer:
- Set up a bain-marie or use your microwave to gently melt the dark chocolate, pausing to inhale that first bittersweet scent. Let it cool for a minute while you separate the egg yolk—sometimes I talk to the eggs for luck.
- Whisk egg yolk and sugar:
- In a mixing bowl, whisk the egg yolk and sugar until the mixture turns pale and creamy—listen for the sugar’s faint crunch as it dissolves.
- Combine chocolate and egg mixture:
- Slowly fold the melted chocolate into the egg mixture; the color will deepen and things seem to magically thicken.
- Whip and fold in cream:
- Whip the cold cream until soft peaks form—go slowly, watching for gentle waves—then fold it into the chocolate mixture until just combined.
- Layer and chill:
- Divide the dark mousse among 6 serving cups, smooth the tops, and let them chill for at least 20 minutes as you prepare for round two.
- Make the milk chocolate mousse:
- Repeat the same process with milk chocolate, relishing how the cream and chocolate create a silky mousse; layer gently over the set dark mousse in each cup.
- Prepare the white chocolate mousse:
- Whip up the white chocolate mousse following the same steps—this time, pipe or spoon it on for a beautiful finish, and stash everything in the fridge for at least 1 hour to fully set.
- Final flourish:
- Right before serving, add a flourish of shaved chocolate or a light dusting of cocoa powder, then pause for a small moment of pride.
 Pin it
 There was a quiet Saturday afternoon when I made these for a friend’s birthday, just the two of us chatting and giggling as we fought over the best spoon for scraping out every last bit. The ritual of layering became its own celebration, and the mousse cups turned dessert into an experience rather than just a sweet treat.
Layering Without Stress
If your layers don’t come out picture-perfect, don’t sweat it—after all, a little swirl of mousse makes every cup feel homemade. Over time, I learned to spoon each layer slowly and gently spread it with the back of a spoon to minimize mixing. Sometimes imperfect lines make for the prettiest desserts.
Choosing the Right Chocolate
I’ve tested these with bargain chocolate and regretted it every single time—the difference good chocolate makes is worth every penny. When you watch each variety melt, you’ll see the texture and sheen change depending on quality. Trust your senses: it should smell rich and snap cleanly.
Make-Ahead Magic and Garnish Secrets
The beauty of this mousse is that it thrives in the fridge, getting silkier by the hour; you can prepare it the night before hosting and just add the garnish before serving for a stress-free finale.
- Use a vegetable peeler to make thin chocolate curls right over each cup.
- If you’re in a hurry, chill in the freezer between layers for quicker set.
- Never garnish until just before serving or the chocolate might lose its snap.
 Pin it
 May your spoons dig deep and your celebrations be sweet—sharing these triple chocolate mousse cups makes any day feel a little more special. Enjoy the layering, the little mistakes, and above all, the joy of chocolate in every form.
Recipe Questions & Answers
- → How do I keep the layers from blending?
-
Spoon the next layer gently over the back of a spoon or pipe it to avoid disturbing the layer beneath. Chill each cup briefly between layers — 15–30 minutes in the fridge or 25–30 minutes in the freezer for a faster set — so the bases firm up and layers remain distinct.
- → Are raw egg yolks safe to use?
-
For lower risk, use pasteurized egg yolks or purchase pasteurized liquid yolks. Alternatively, use a stabilized whipped cream or a commercial egg-replacer designed for custard-like textures if serving to people with weakened immune systems.
- → How long should the cups chill before serving?
-
Chill the assembled cups for at least 1 hour to fully set the mousses. For firmer texture or quicker service between layers, you can use short freezer chills of 25–30 minutes, then transfer to the refrigerator for the final set.
- → Can I make these ahead and how should I store them?
-
Assemble up to 48 hours in advance and keep covered in the refrigerator. Add any shaved chocolate or cocoa dusting just before serving to preserve appearance. Freezing is not recommended—textural changes can occur when thawed.
- → What can I substitute for dairy to make a non-dairy version?
-
Use full-fat coconut cream whipped to soft peaks in place of heavy cream and choose dairy-free dark, milk-style, and white-style chocolates. Note that whipping properties and final mouthfeel will differ slightly from the dairy version.
- → Any tips for melting and working with chocolate?
-
Melt chocolate gently over a bain-marie or in short microwave bursts, stirring frequently. Avoid contact with water and work with finely chopped pieces for even melting. Use good-quality chocolate for cleaner flavor and a silkier mousse.